I managed to find a FREE desk, and decided what better excuse...
Missing knobs, paint spackle, deep gouges - I have no idea why it was free? lol
A little sanding and some wood filler:
A coat of primer...
and let the "silvering" begin!
I found a tutorial on ThreeBoys.net and her desk was AMAZING, so it seemed a safe bet.
Round1: spray paint the desk silver.
I did a couple of coats because I couldn't decide which silver I liked best.
Round 2: Apply several light coats of Polyurethane.

Round 3: Once all the coats of poly are dry - very lightly sand with 300, 400 and then 600 grit sand paper.
- Wrap the sandpaper around a sponge and dip in soapy water. LIGHTLY sand.
VERY lightly.
You should only do this for a minute or so, just enough so you feel that the 'drag' is gone.
ThreeBoys.net went so far as to use 1000 and 2000 grit, but I couldn't find anything that fine.
Dry.
At this point you will have sanded most of the shine out of the paint. I don't own anything that is "antique silver" but I think this is the look you want?
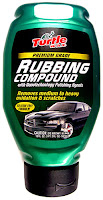
Round 4: Time for the Rubbing Compound and Swirl Remover.
I found these at Canadian Tire:

First apply the rubbing compound as per the instructions on the bottle. What this does is micro-sand the piece and help fill some of the scratches.
Next use the swirl remover to get a polish going.
It should look kind of like this:
I say "kind of" because the above photo also shows...
Round 5: Antique the edges with an antique glaze if you can find one, or I used a regular (brown) stain and lightly brushed it on and dabbed it back off with a clean terry towel.
If I could offer a suggestion at this point, I'd say put the glaze/stain on a little heavier than you want to have on the finished piece.
Reason being, the stain doesn't adhere all that well to the previous coats of wax, and when you get to the next coat of wax in Round 6, you'll be able to remove anything that you think is too heavy.
So, Round 6: Carnauba wax. This is to seal in the stain/glaze and to give the desk the final glassy shine. Please remember to wax lightly.
Your finished product should look like this:
I've never "antiqued" anything before, so I went lightly on the stain just in case.
In hindsight, I'd go heavier next time.
Should I sell this as an "Antique Silvered Desk" or as a "Antique Silvered Vanity"?
Link Party:
 |
| Miss Mustard Seed |


This looks beautiful! So shiny! I love how the finish came out.
ReplyDeleteLindsey@BetterAfter